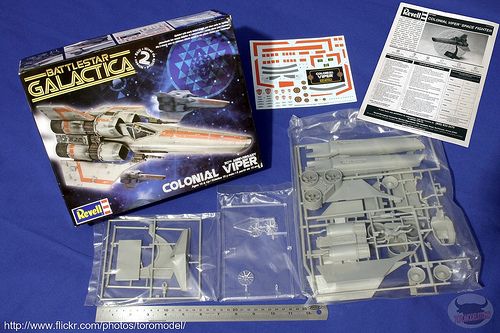
This is one kit I need not go into much details on how you could build up your Colonial Mark I Viper as seen by the many beautiful and creative builds out there (just google "Mark I Colonial Viper" and you can see some of them) , but from my observation and based on feedback I had gathered, there are still many who are not aware of what is available to them. So this post's objective is just to let everyone know what is still accessible .... that is as of 3rd Sept 2012.
I have also noticed that previously when I had highlighted the direct links at my earlier post to those after market parts, through the course of time some of these became extinct .. ok, out of production, the links then became dead links. So what I am going to do now is just highlight them here and post where you can get them. If you can't find those items there, I suggest maybe writing to the shop owner first.
Alrighty, let's begin.
Cockpit Upgrade/Conversion
Why upgrade the cockpit for this kit when its hard to see the inside once she is build? You will probably hear this played over and over and you know what. it is really up to you. As a scale modeler, I'd rather have the best for my kit but others may just opt for a quick build. So if you are interested in working on the cockpit tub, read on.

First of all, if you happen to have the older issues, you know, the one without a cockpit and has that opaque canopy, and you want to build up the cockpit area, then you want to look into what Millennia Models International (MMI) has to offer.
A word about MMI. The company is actually managed by one man, and technically is still around despite what people may tell you (his business have closed down). He is still casting a few conversion and upgrade sets for the Revell/Monogram Viper. He is active at the Starship Modeler forum and his pseudonym there is Johnny Crash. You can try to look for him there if you need anything within his range of products.
Another thing I like about MMI, this company pride itself with the quality and accuracy of its range, so if you do decide to get his conversion or upgrade sets, you'd be building a kit closer to the actual studio model.
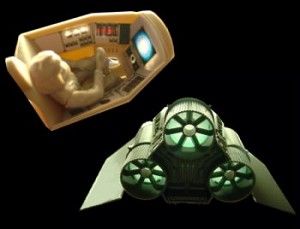
MMI offers two different variant of cockpits. The first is for the single seater version which I noticed is out of stock everywhere. Federation Models still has a section dedicated to this version despite it being not in stock, but you can try writing to Tracy Brownfield at this email address to see if he is getting any restock.
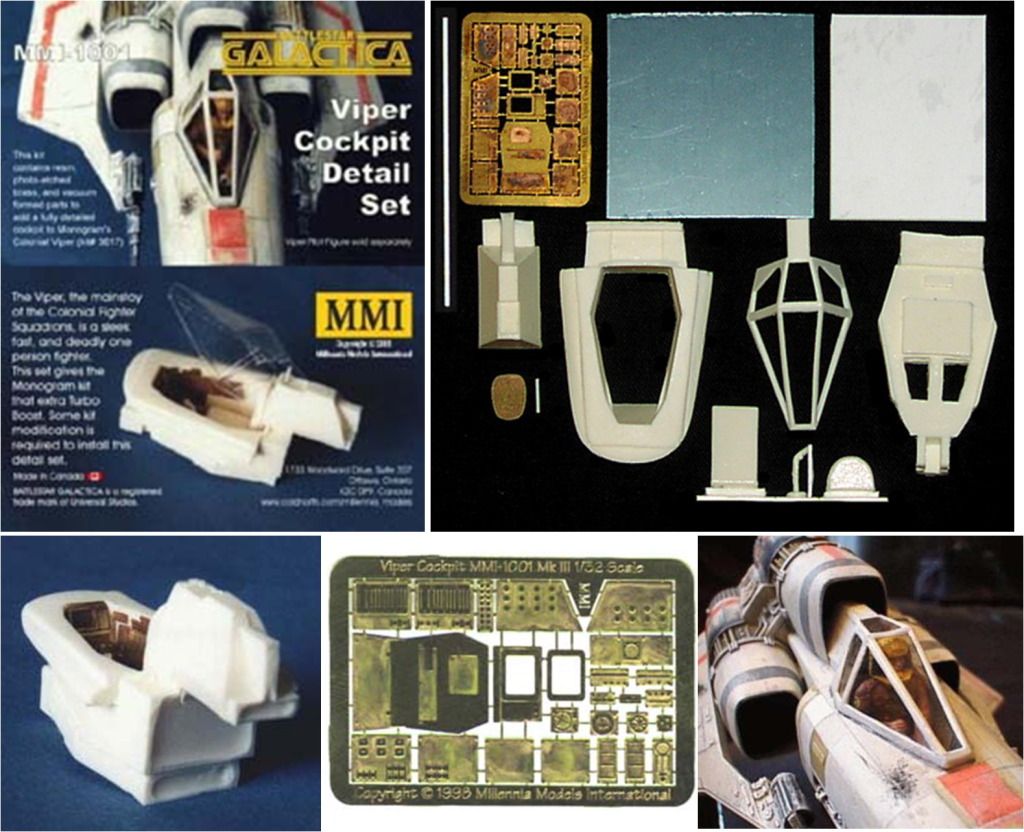 |
| MMI Single Seater Viper Cocpit Set |
And the second version is for the dual seater set, seen in "Galactica 80" TV series. This set is still available over at Starship Modeler Webstore if you want to build this variant.

I actually have the dual seater cockpit set as I had an older kit among the newer reissues. I figured it would be really cool to have the two variant Mark I Vipers displayed side by side.
Since I have this set, I can attest to the quality of the conversion resin parts. MMI really thought through the whole thing, providing the Photo etch instruments and even the canopy is accurate to the tee. You can see her below in my WIP Colonial Mark I Viper. You will need to cut off a rather large section of the fuselage to fit that cockpit tub and here's the beauty about this conversion set. The instructions came in an A4 size paper with an exact scaled plan of the areas to be cut. Just trace it to your Viper fuselage part, and gently cut away.
Unfortunately for me, this is my first kit I actually tried a conversion set on. Otherwise I'd be building most of them straight out of the box (OOB) or just with some photo etch (PE) so needless to say, I screwed up big time. I cut off way too much. This is why I am forever indebted to ... AVES, a two compound epoxy putty that cures just like plastic. I'll go more into AVES in another post later.
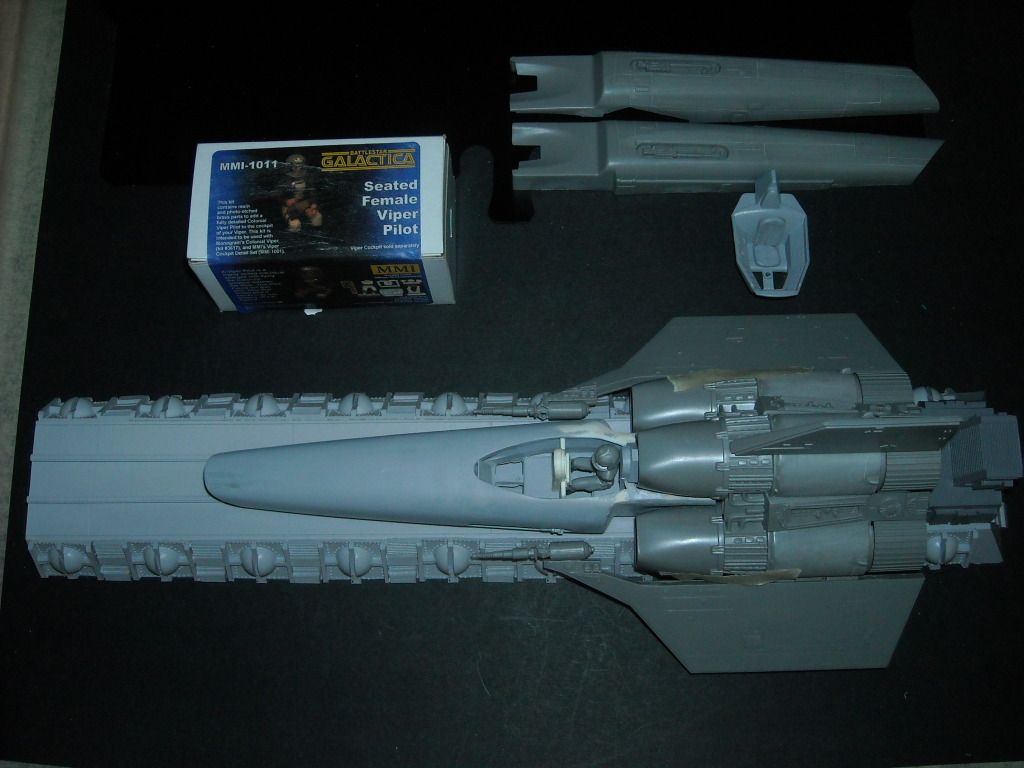 |
| My dual seater conversion set is permanently on my Mark I Viper sitting on the launch rail. You can't see any of my "mistakes" now thanks to AVES. On top of is the second Mark I which I plan to build as the single seater. |
I would recommend that you get the MMI single seater conversion set to replace the reissue's cockpit tub. She is definitely much better to look at, highly accurate and will definitely give your kit a more realistic if not a more believable cockpit look. But if you are not up to all those cutting and filing, and plan to light up your kit, well then .....
Here is how the kit's plastic cockpit tub originally looks like. Its just a simple tub with molded on instrument panels. They look easy to work with or paint, but believe me unless you have a steady hand, getting the brush to stay on the panels takes some practice.

But as with all kits, creativity can make the tub look really good, as seen by this build here. Panel dials and gauges were drilled out to provide light access while the other molded panels were expertly painted. The end result is quite satisfying.
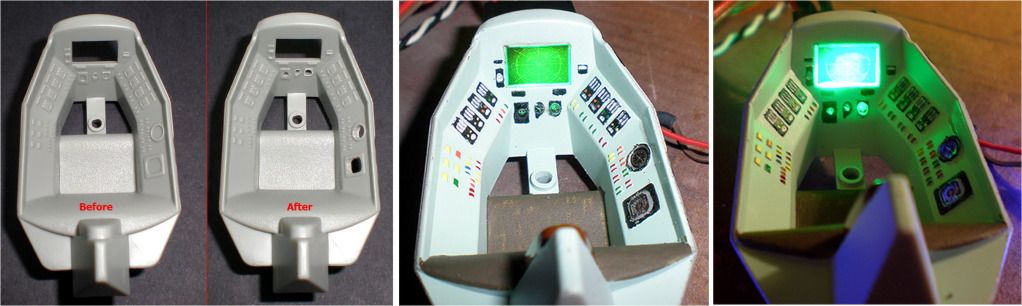 |
| Reworking the cockpit tub for lighting. Image taken from swannysmodels.com |
The problem about using those existing molded panels, look at the abundance of space in between. If any of you have actually seen a real plane's instrument layout in the cockpit, you would know that the instruments literally clutter the entire console. Its like driving a Lexus. You probably wouldn't even know what half of those buttons and switches do.
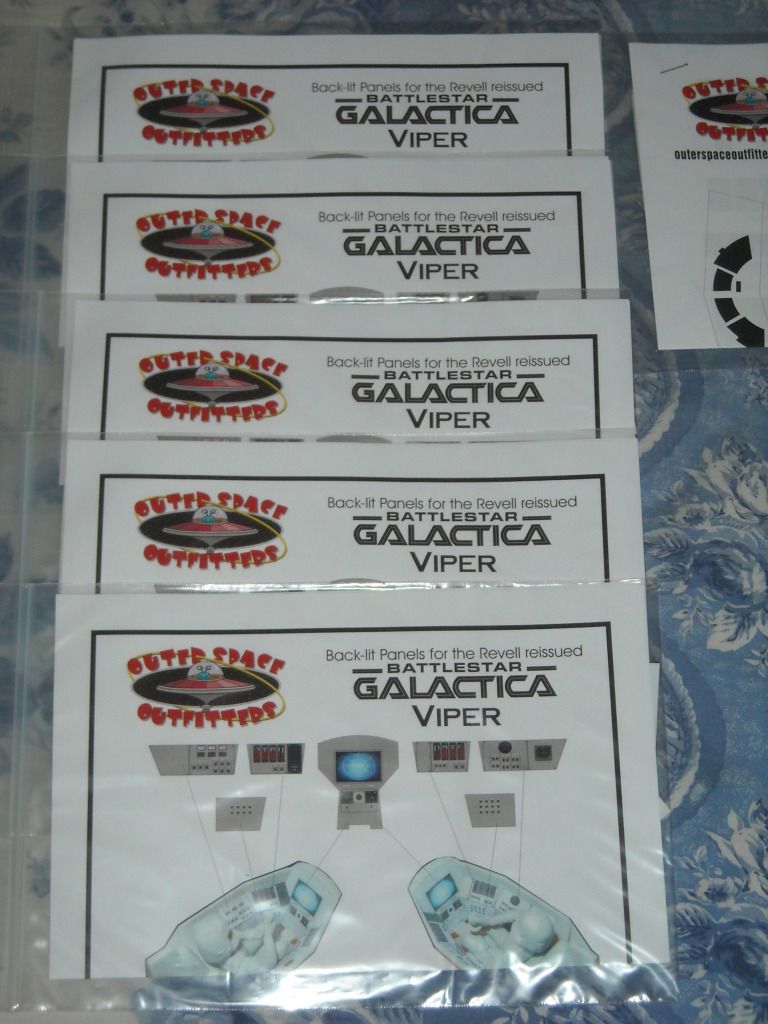
Hence let me introduce to you "Outer Space Outfitters" panels done up on translucent plastic. The nice thing about these panels is that they look good both lighted up and unlighted, but you will need to cut of sections of your tub's sidewalls if you want to light up your kit.
This wonderful set is currently still available after a long hiatus. I actually had to wait nearly a year to get them. You can find them over at CultTVman Hobbyshop and if you have a few of these kits stashed away somewhere, I would recommend you get them asap before the disappear again.
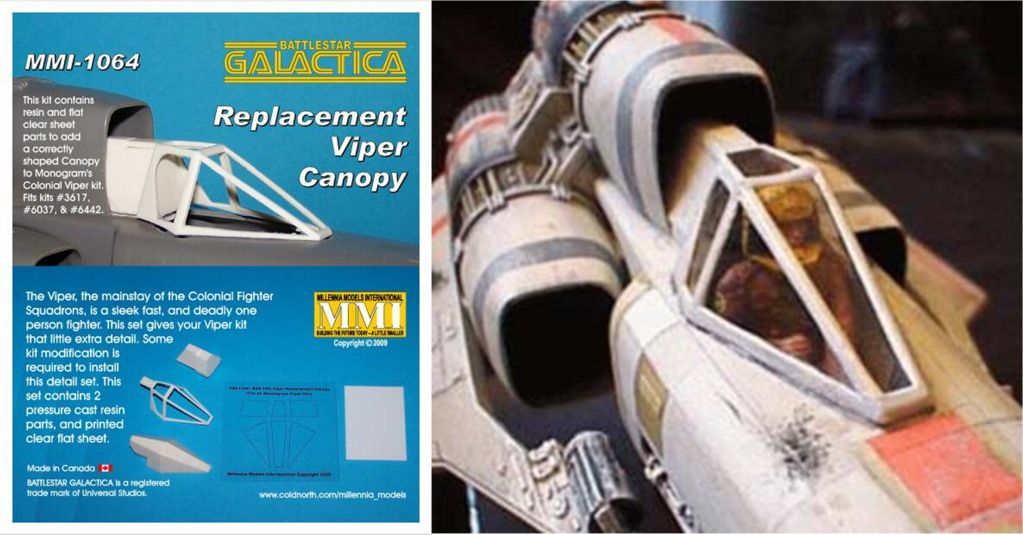
And finally, if you are nit picky about accuracy, you may want to replace the canopy as well. The clear set provided from the kit is actually alright by itself, but according to MMI, the slope angle of the canopy is wrong as well as the rear window pattern. One thing nice about this set is that its easier to build it with the canopy in an upward position. I'm not comfortable cutting off clear parts as they are brittle and breaks easily.
No comments:
Post a Comment